

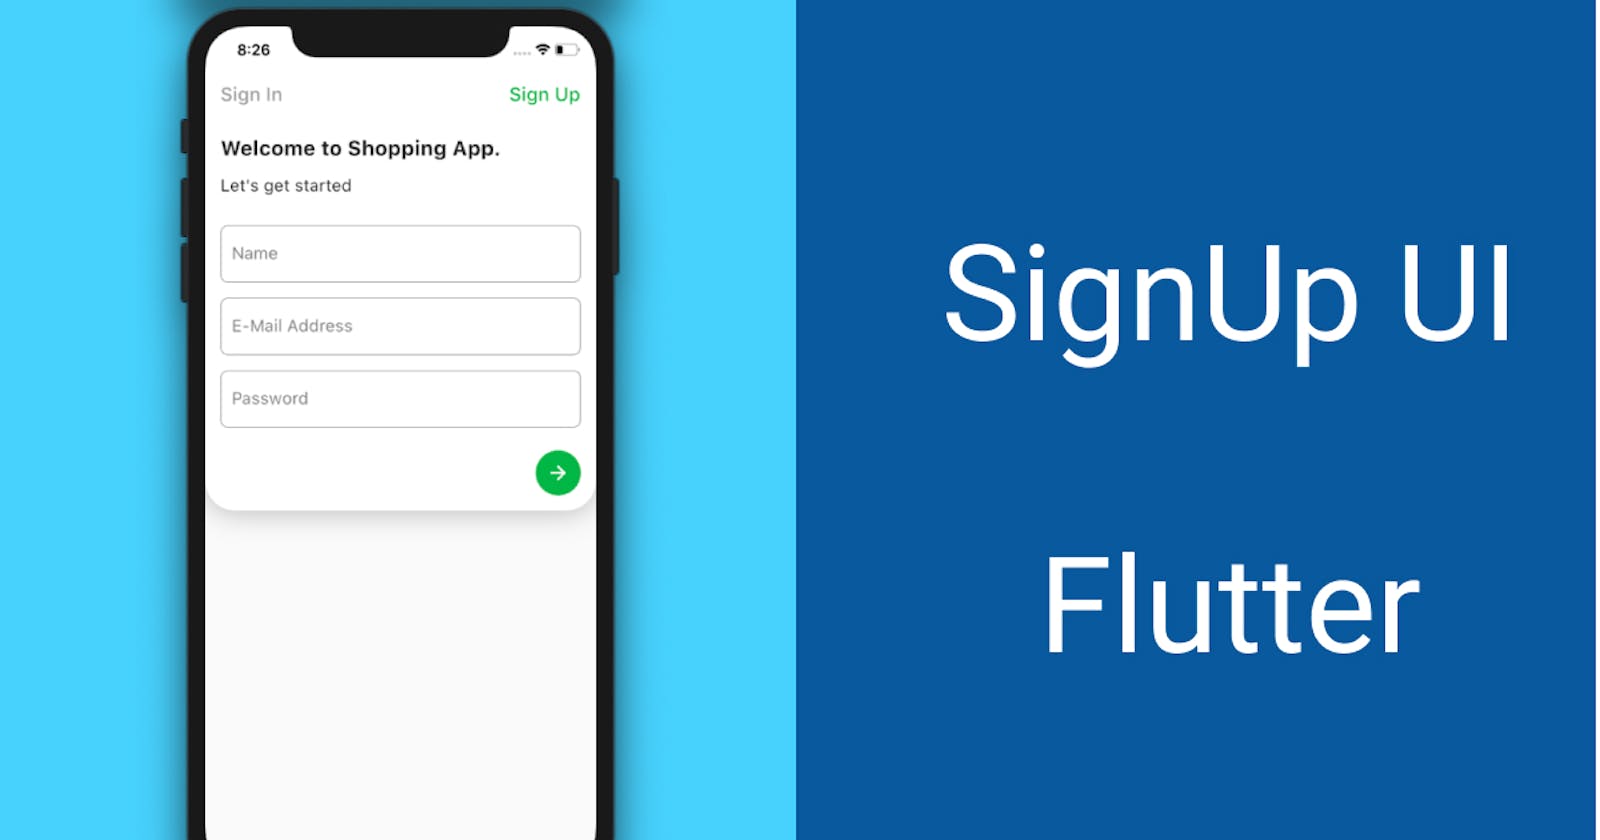
SignUp form with Flutter Building a Shopping App (Part-1)
Part -1: Building the login page


You will need Flutter set up on your machine. This tutorial assumes you are using Visual Studio Code for development.
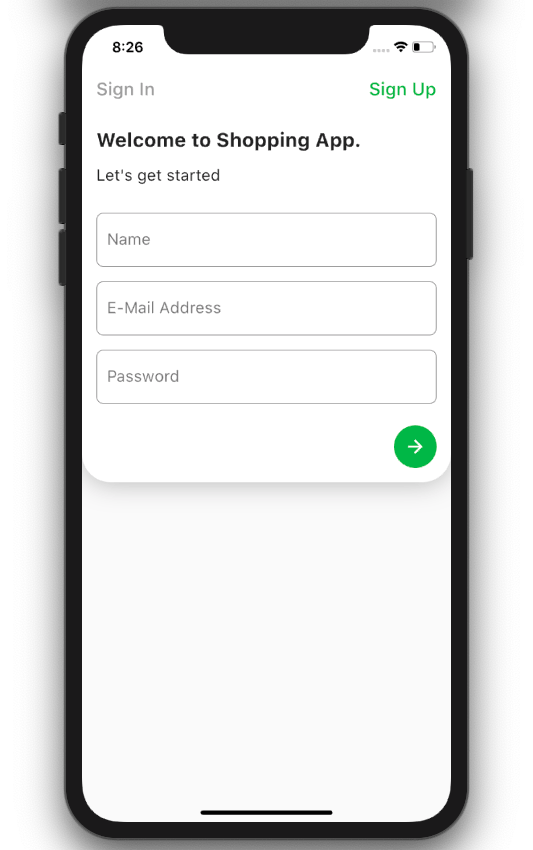
DEMO
Here is the final output of the Signup screen which we are going to develop
BUILD THE UI
Open the file ..lib/main.dart
main.dart is the entry point of our flutter application and holds the basic and important things of the flutter application.
MAIN.DART IN DETAILS
import 'package:flutter/material.dart';
The above piece of code imports the Material Library from the Flutter SDK
void main() {
  runApp(MyApp());
}
The main() function is the entry point of the main.dart, runApp with executing the class MyApp. his function makes the MyApp widget the root of the widget tree
Then we define our MyApp widget. Amend your MyApp class like the following
class MyApp extends StatelessWidget {
  // This widget is the root of your application.
  @override
  Widget build(BuildContext context) {
    return MaterialApp(
      title: 'Shopping App',
      debugShowCheckedModeBanner: false,
      theme: ThemeData(
        primarySwatch: Colors.blue,
        visualDensity: VisualDensity.adaptivePlatformDensity,
      ),
      routes: Routes.routes,
    );
  }
}
In the above snippet,
- Change the title property to whatever you want to give here we have given Shopping App.
- Remove the home parameter, the home parameter will load our initial widget.
- The routes will be the routes of our app, which we will come to part in some time.
- Remove the rest of the code from the main.dart
The final code of the main.dart will look like below
import 'package:flutter/material.dart';
import 'package:shopping_kit/routes.dart';

void main() {
  runApp(MyApp());
}

class MyApp extends StatelessWidget {
  // This widget is the root of your application.
  @override
  Widget build(BuildContext context) {
    return MaterialApp(
      title: 'Shopping App',
      debugShowCheckedModeBanner: false,
      theme: ThemeData(
        primarySwatch: Colors.blue,
        visualDensity: VisualDensity.adaptivePlatformDensity,
      ),
      routes: Routes.routes,
    );
  }
}
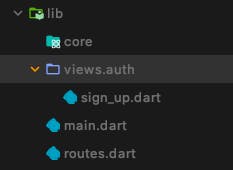
####LETS CREATE THE REQUIRED FILES AND PACKAGES
Create a new package named views and core inside the lib folder, inside views create a new package named auth
Inside the auth package create a new dart file named sign_up.dart
Also inside the lib create a new file named routes.dart, the routes file will hold the routes of the application.
The final structure of the app will look like below
#####SIGN_UP.DART Import the Material Flutter SDK
import 'package:flutter/material.dart';
Create a stateful widget named SignUp ( Android studio shortcut stful )
Create a static const variable named tag and define the value as ‘/’
static const tag = '/';
The initial code of the sign_up.dart will be below
import 'package:flutter/material.dart';

class SignUp extends StatefulWidget {
  static const tag = '/';

  @override
  State<StatefulWidget> createState() {
    return _SignUpState();
  }
}

class _SignUpState extends State<SignUp> {
  @override
  Widget build(BuildContext context) {
    return Scaffold();
  }
}
Below class will be the state of our SignUp class, that returns a Scaffold, The scaffold is a Material Widget that has some basic properties of the Material Design Theme like
- AppBar
- Floating Action Button
- Drawer
- BottomNavigation Bar
- and much more
class _SignUpState extends State<SignUp> {
  @override
  Widget build(BuildContext context) {
    return Scaffold();
  }
}
CREATE THE APPBAR :
Our app bar has two buttons SignUp and SignIn which will turn green based on the selection as of now keep the SignUp button green and below will be a snippet of the app bar.
/// this will be app bar of the app
  final Widget appBar = AppBar(
    titleSpacing: 0,
    elevation: 0,
    brightness: Brightness.light,
    backgroundColor: Colors.white,
    title: Container(
      child: Row(
        mainAxisAlignment: MainAxisAlignment.spaceBetween,
        crossAxisAlignment: CrossAxisAlignment.center,
        children: <Widget>[
          FlatButton(
            onPressed: () {},
            child: Text(
              'Sign In',
              style: TextStyle(
                fontSize: 20,
                color: Colors.grey,
              ),
            ),
          ),
          Container(
            child: FlatButton(
              onPressed: () {},
              child: Text(
                'Sign Up',
                style: TextStyle(
                  fontSize: 20,
                  color: Colors.green,
                ),
              ),
            ),
          ),
        ],
      ),
    ),
    centerTitle: false,
  );
CREATING WELCOME TEXT AND TITLE
The welcome text is two different texts with different tiles, so we will be wrapping the two text widgets with the column as shown below
crossAxisAlignment: CrossAxisAlignment.start this will make sure that all the child of the column will be aligned to start.
final welcomeTitle = Column(
    crossAxisAlignment: CrossAxisAlignment.start,
    children: [
      Container(
        margin: EdgeInsets.only(
          left: 16,
          top: 16,
          bottom: 8,
        ),
        child: Text(
          'Welcome to Shopping App.',
          style: TextStyle(
            fontSize: 22,
            fontWeight: FontWeight.bold,
          ),
        ),
      ),
      Container(
        margin: EdgeInsets.only(left: 16, top: 8),
        child: Text(
          'Let\'s get started',
          style: TextStyle(
            fontSize: 18,
            fontWeight: FontWeight.normal,
          ),
        ),
      ),
    ],
  );
CREATE NAME TEXTFIELD
Here we will be using a text field wrapped inside the padding widget to give proper padding.
  final nameField = Padding(
    padding: EdgeInsets.only(left: 16, right: 16, top: 32, bottom: 8),
    child: TextField(
      style: TextStyle(fontSize: 18),
      keyboardType: TextInputType.text,
      textCapitalization: TextCapitalization.words,
      decoration: InputDecoration(
        hintText: 'Name',
        enabledBorder: OutlineInputBorder(
          borderRadius: BorderRadius.circular(8),
          borderSide: BorderSide(color: Colors.grey),
        ),
        focusedBorder: OutlineInputBorder(
          borderRadius: BorderRadius.circular(8),
          borderSide: BorderSide(color: Colors.grey),
        ),
      ),
    ),
  );
In the above snippet, we are using the Outline input border as the text field decoration
We will be creating two more text fields Password Field and Email Field which follows the same decoration as above
CREATING NEXT BUTTON
The next button will be used to validate the entered details and invoke API calls which we will be explained in the next blog post
            Align(
                  alignment: Alignment.centerRight,
                  child: Container(
                    margin: EdgeInsets.all(16),
                    decoration: BoxDecoration(
                      color: Colors.green,
                      shape: BoxShape.circle,
                    ),
                    child: IconButton(
                      color: Colors.white,
                      onPressed: () {
                        Navigator.pushNamed(context, '/grocery/verify');
                      },
                      icon: Icon(Icons.arrow_forward),
                    ),
                  ),
                ),
The above code is the button, which is created with a container and decoration and icon button as a child.
So we have created the SignUp UI, in the next blog post we will learn how to
- Validate the entered details
- Integrate with RestFul API
- Single sign-on and handling the sign-in signup logics
The above snippet is the final code of the sign_up page.
import 'package:flutter/material.dart';

class SignUp extends StatefulWidget {
  static const tag = '/';

  @override
  State<StatefulWidget> createState() {
    return _SignUpState();
  }
}

class _SignUpState extends State<SignUp> {
  @override
  Widget build(BuildContext context) {
    return Scaffold(
      appBar: appBar,
      body: ListView(
        children: <Widget>[
          Container(
            decoration: decoration,
            alignment: Alignment.topCenter,
            child: Column(
              mainAxisAlignment: MainAxisAlignment.start,
              crossAxisAlignment: CrossAxisAlignment.start,
              mainAxisSize: MainAxisSize.min,
              children: <Widget>[
                welcomeTitle,
                nameField,
                emailField,
                passwordField,
                signUpButton,
              ],
            ),
          ),
        ],
      ),
    );
  }

  /// this will be app bar of the app
  final Widget appBar = AppBar(
    titleSpacing: 0,
    elevation: 0,
    brightness: Brightness.light,
    backgroundColor: Colors.white,
    title: Container(
      child: Row(
        mainAxisAlignment: MainAxisAlignment.spaceBetween,
        crossAxisAlignment: CrossAxisAlignment.center,
        children: <Widget>[
          FlatButton(
            onPressed: () {},
            child: Text(
              'Sign In',
              style: TextStyle(
                fontSize: 20,
                color: Colors.grey,
              ),
            ),
          ),
          Container(
            child: FlatButton(
              onPressed: () {},
              child: Text(
                'Sign Up',
                style: TextStyle(
                  fontSize: 20,
                  color: Colors.green,
                ),
              ),
            ),
          ),
        ],
      ),
    ),
    centerTitle: false,
  );

  /// container decoration
  final decoration = BoxDecoration(
    boxShadow: [
      new BoxShadow(
        color: Colors.black26,
        offset: new Offset(0.0, 2.0),
        blurRadius: 25.0,
      )
    ],
    color: Colors.white,
    borderRadius: BorderRadius.only(
      bottomLeft: Radius.circular(32),
      bottomRight: Radius.circular(32),
    ),
  );

  final welcomeTitle = Column(
    crossAxisAlignment: CrossAxisAlignment.start,
    children: [
      Container(
        margin: EdgeInsets.only(
          left: 16,
          top: 16,
          bottom: 8,
        ),
        child: Text(
          'Welcome to Shopping App.',
          style: TextStyle(
            fontSize: 22,
            fontWeight: FontWeight.bold,
          ),
        ),
      ),
      Container(
        margin: EdgeInsets.only(left: 16, top: 8),
        child: Text(
          'Let\'s get started',
          style: TextStyle(
            fontSize: 18,
            fontWeight: FontWeight.normal,
          ),
        ),
      ),
    ],
  );

  final nameField = Padding(
    padding: EdgeInsets.only(left: 16, right: 16, top: 32, bottom: 8),
    child: TextField(
      style: TextStyle(fontSize: 18),
      keyboardType: TextInputType.text,
      textCapitalization: TextCapitalization.words,
      decoration: InputDecoration(
        hintText: 'Name',
        enabledBorder: OutlineInputBorder(
          borderRadius: BorderRadius.circular(8),
          borderSide: BorderSide(color: Colors.grey),
        ),
        focusedBorder: OutlineInputBorder(
          borderRadius: BorderRadius.circular(8),
          borderSide: BorderSide(color: Colors.grey),
        ),
      ),
    ),
  );

  final emailField = Padding(
    padding: EdgeInsets.only(left: 16, right: 16, top: 8, bottom: 8),
    child: TextField(
      keyboardType: TextInputType.emailAddress,
      style: TextStyle(fontSize: 18),
      decoration: InputDecoration(
        hintText: 'E-Mail Address',
        enabledBorder: OutlineInputBorder(
          borderRadius: BorderRadius.circular(8),
          borderSide: BorderSide(color: Colors.grey),
        ),
        focusedBorder: OutlineInputBorder(
          borderRadius: BorderRadius.circular(8),
          borderSide: BorderSide(color: Colors.grey),
        ),
      ),
    ),
  );

  final passwordField = Padding(
    padding: EdgeInsets.only(left: 16, right: 16, top: 8, bottom: 8),
    child: TextField(
      obscureText: true,
      style: TextStyle(fontSize: 18),
      keyboardType: TextInputType.text,
      decoration: InputDecoration(
        hintText: 'Password',
        enabledBorder: OutlineInputBorder(
          borderRadius: BorderRadius.circular(8),
          borderSide: BorderSide(color: Colors.grey),
        ),
        focusedBorder: OutlineInputBorder(
          borderRadius: BorderRadius.circular(8),
          borderSide: BorderSide(color: Colors.grey),
        ),
      ),
    ),
  );

  final signUpButton = Align(
    alignment: Alignment.centerRight,
    child: Container(
      margin: EdgeInsets.all(16),
      decoration: BoxDecoration(
        color: Colors.green,
        shape: BoxShape.circle,
      ),
      child: IconButton(
        color: Colors.white,
        onPressed: () {
          // Navigator.pushNamed(context, '/grocery/verify');
        },
        icon: Icon(Icons.arrow_forward),
      ),
    ),
  );
}
The above snippet is the final code of the sign_up page.
CREATE ROUTES
Here we will be using named routes instead of push. Using named routes will be handy when the app becomes complex and helps in navigation between the pages.
Open the routes.dart and import the material API and our sign_up.dart
import 'package:flutter/material.dart';
import 'package:shopping_kit/views/auth/sign_up.dart';
Next, create a class named Routes
Inside the Routes, the class create a static Map with type named routes
Here the string of the map will the tag that we created inside the SignUp class and the next param WidgetBuilder will be the builder function
import 'package:flutter/material.dart';
import 'package:shopping_kit/views/auth/sign_up.dart';

class Routes {
  static Map<String, WidgetBuilder> routes = {
    SignUp.tag: (context) => SignUp()
  };
}
All the other navigation routes should be added to the routes map and the routes should be added to the routes param inside the Material app we created in the main.dart
The value of the SignUp.tag is ‘/’, the / represents that this will be the initial route of the application so when routes get executed it will open the default route. So that we can ignore the home param inside the MaterialApp
The final main.dart will look like below
import 'package:flutter/material.dart';
import 'package:shopping_kit/routes.dart';

void main() {
  runApp(MyApp());
}

class MyApp extends StatelessWidget {
  // This widget is the root of your application.
  @override
  Widget build(BuildContext context) {
    return MaterialApp(
      title: 'Shopping App',
      debugShowCheckedModeBanner: false,
      theme: ThemeData(
        primarySwatch: Colors.blue,
        visualDensity: VisualDensity.adaptivePlatformDensity,
      ),
      routes: Routes.routes,
    );
  }
}
Hope you learned how to create a sign_up form and use named routes for navigation and clean coding.
The code is available in GitHub, For more posts Star and Fork the repo
I hope you enjoyed the article. Follow me on Linkedin | Github | Twitter @leoelstin for more articles.